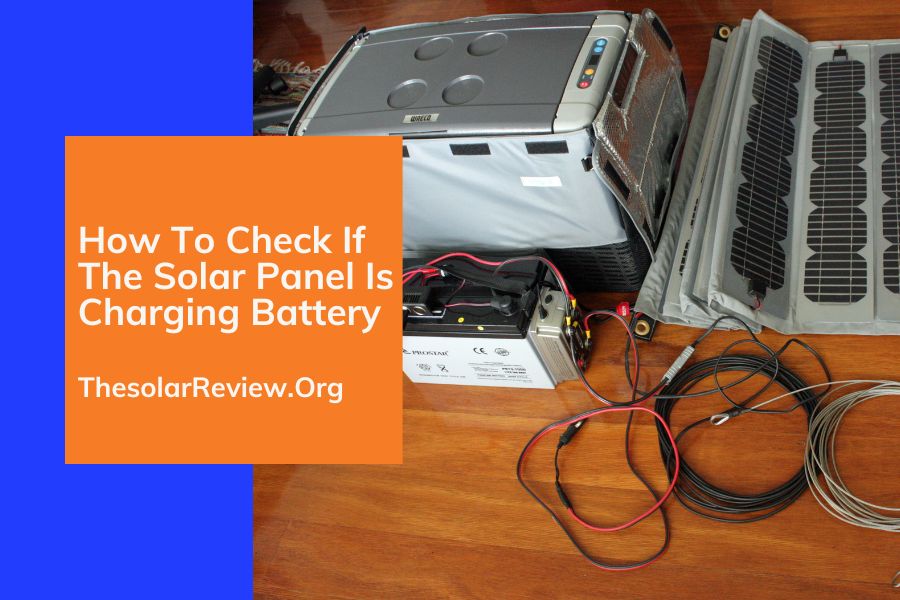
Want to know How To Check If The Solar Panel Is Charging Battery? Look no further because you have just landed the right spot and we will help you out in How To Check If The Solar Panel Is Charging Battery
As a homeowner or solar panel enthusiast, testing the battery charger to ensure your solar-powered device’s smooth and reliable performance is essential. If you hear a solar installation, create solar particles under which you can fully harness the power of solar electricity and contribute to a more sustainable future.
This guide highlights the importance of monitoring the battery life of solar panels and provides valuable insights to ensure you get the most out of your investment.
This article guides homeowners and fans on managing their solar panel battery charging process. It highlights the importance of this exercise for the efficiency and reliability of your solar-powered system.
Before getting into the main topic of making sure the solar panel is charging correctly, it’s essential to understand the basics of solar charging:
Solar Battery Charging Basics
The solar battery charger is an integral part of the solar panels. This involves converting daylight into energy and storing that electricity in batteries for later use. Here are essential principles to understand.
1. Solar Cells (Photovoltaic Cells)
Solar devices, also known as photovoltaic cells, are made of semiconductor materials, usually silicon. Those cells exposed to sunlight produce direct current (DC) in the photoelectric effect.
2. Charge controller
The value controller is the central controller of the charge from the solar panel to the battery. It prevents the battery from becoming too high and ensures it is appropriately and adequately charged.
3. Battery Bank
The energy produced by solar panels is stored in batteries. These batteries contain lead acid, lithium-ion, and more. Excess power generated during the solar eclipse is purchased during the day or on cloudy nights.
4. Inverter
Solar panels provide DC power, but most family appliances and power grids operate alternatively on modern (AC). The inverter converts the DC energy from the batteries into AC electricity for family use.
5. Solar Charge Cycle
The process of solar battery charging consists of several layers of bulk charge, absorption charge, and float charge. These degrees ensure the battery is optimized and maintained in the correct voltage phases.
6. Inspection and Maintenance
Regular follow-up and maintenance are essential to ensure the optimal performance of your solar battery. This includes national surveys of battery bank rates, voltage ranges and overall health.
Understanding these solar battery charging basics is essential for homeowners and solar enthusiasts alike. This professional team motivates you to track and optimize your solar panel battery charging process, ensuring that you use the full potential of your solar panels.
Solar battery voltage chart
A voltage chart usually shows the voltage level of a battery in a charge. This is a helpful index for measuring battery conditions. Then again, the country value is the charging percentage directly reflecting the battery’s internal capacity and readiness to power up.
Taken together, the country of consumption provides a highly variable battery capacity at any given time. Here is a simplified solar battery capacity chart with state-by-state versions of the tax: A voltage chart usually shows the voltage level of a battery in a charge.
This is a helpful index for measuring battery conditions. Then again, the country value is the charging percentage directly reflecting the battery’s internal capacity and readiness to power up. Taken together, the country of consumption provides a highly variable battery capacity at any given time.
Here is a simplified solar battery capacity chart with state-by-state versions of the tax:
| State of Charge (%) | Battery Voltage (Volts) | Explanation |
| 0-20% | 10.5 – 11.6 | In this range, the battery is critically low and needs immediate recharging. Operating in this state for extended periods can damage the battery. |
| 20-40% | 11.6 – 11.9 | The battery is low and requires recharging soon to avoid deeper discharge. |
| 40-60% | 11.9 – 12.2 | This is the ideal operating range for most batteries, providing a good balance between performance and longevity |
| 60-80 % | 12.2 – 12.4 | The battery is moderately charged, offering a decent amount of stored energy |
| 80-100% | 12.4 – 12.7 | The battery is fully charged and ready for use. However, it’s important not to overcharge and stay in this state for prolonged periods, as it can lead to damage |
Explanation!
0-20% (Critically Low): At this level, the battery is very low and there is a danger of overloading, which can cause irreversible damage. It is important to recharge the battery immediately to avoid battery failure.
20-40% (less): Battery charge is low and must be recharged immediately to avoid further damage. Prolonged work in this mode can reduce battery life.
40-60% (optimal): This is the ideal state of charge for most batteries, balancing efficiency and battery longevity. So, storing the battery can extend its life.
60-80% (moderate): The battery is moderately charged, providing adequate energy reserve. This is an ideal situation for daily use, and regular recharging should be part of the maintenance routine.
80-100% (fully charged): The battery is fully charged and ready for use. It is important to keep the battery up to 100% as long as you don’t overcharge the battery as this can damage the battery, especially with lead-acid batteries
Please note that exact power levels may vary slightly depending on the type of battery (e.g., lead acid, lithium-ion) and that regularly checking the manufacturer’s specifications for charging voltage levels helps ensure that your solar. The battery system works well and lasts a long time.
List Of Equipment And Tools
Collect the essential equipment and tools to check the solar panels’ charging batteries.
To evaluate if your solar panel is facilitating the charging of your battery in an efficient manner, you’ll need various essential tools and materials.
Here’s a list of items required:
1. Multimeter
A multimeter is a versatile tool that measures various electrical parameters, including voltage, current, and resistance. You’ll use it to measure the voltage output of your solar panels and monitor the charging process.
2. Voltage Tester
A voltage tester, sometimes called a voltage detector or voltage pen, is a compact tool that identifies electricity flow within a circuit without requiring direct contact. This device is a protective measure to guarantee that the solar panel is not live while one is servicing it.
3. Safety Gear
Safety should be a top priority when working with electrical systems. Ensure you have the following safety gear:
- Safety Glasses: Protect your eyes from hazards like sparks or debris.
- Insulated Gloves: Wear gloves to protect your hands from electrical shock.
- Safety Shoes: Non-conductive, rubber-soled shoes provide additional protection.
- Protective Clothing: Use appropriate clothing to prevent accidental contact with live components.
4. Wrenches And Screwdrivers
These essential hand tools are often needed to open the junction box or access the wiring connections on your solar panels or charge controller.
5. Documentation
Have access to the user manuals and documentation for your solar panel system. This information can be invaluable when troubleshooting or checking the system’s specifications.
6. Notepad And Pen
Keep a notepad and pen handy for jotting down measurements, notes, or any issues you encounter during the inspection.
7. Safety Disconnect Switch:
Depending on your solar panel system’s design, you may have a safety disconnect switch that isolates the solar panels from the battery. Ensure you have access to it for safety and maintenance purposes.
8. Ladder or Scaffold
If your solar panels are mounted on a roof or elevated, you’ll need a ladder or scaffold to access them safely.
9. Cell Phone or Communication Device
It’s a good idea to have a cell phone or communication device on hand if you need to contact someone for assistance or guidance.
10. Personal Protective Equipment (PPE)
Depending on the specifics of your solar setup, you may require additional personal protective equipment, such as fall protection gear, if you are working at heights.
Remember that safety should always come first when working with electrical systems. Ensure that you are familiar with the safety procedures and guidelines for your specific solar panel setup, and consider consulting a professional or installer if you need clarification on any aspect of the process.
How To Check If A Solar Panel Is CA Battery
Here are simple and easy-to-follow steps on how to check if a solar panel is charging a battery using a multimeter:
Monitoring Battery Charging and the Role of the Charge Controller:
Monitoring the battery charging process is critical to maintaining the health and efficiency of your solar power system. The charge controller plays a central role in this process. Here’s how to monitor battery charge using a voltage tester, along with an explanation of the significance of voltage levels and guidelines for accurate testing:
Step 1: Safety Precautions First
Put on your safety gear, including safety glasses and insulated gloves, to protect yourself from electrical hazards.
Step 2: Gather Your Tools and Safety Gear
- Ensure you have your multimeter, voltage tester, safety gear (safety glasses and insulated gloves), and any necessary hand tools.
- For checking solar panel output, use a multimeter.
- For monitoring battery charge, use a voltage tester.
Step 3: Solar Panel Output Check (Using Multimeter)
Turn your multimeter on and set it to the DC voltage (V) and DC (A) settings. The voltage setting should be higher than the expected output voltage of your solar panel (typically 12V or 24V for most solar setups).
Measure Voltage
- Connect the multimeter to the solar panel terminals. The red lead goes to the positive terminal, and the black lead to the negative terminal. Ensure a secure connection.
- Place the solar panel in direct sunlight and observe the multimeter reading. It should display the voltage output of the solar panel.
- The voltage reading will vary depending on factors such as sunlight intensity and the type of solar panel. Reading within the expected range (e.g., 18-22V for a 12V panel) means it’s generating power.
- For current, a positive reading (e.g., five mA or 0.5 A) indicates that the solar panel is delivering current to the load or battery.
- If you see no voltage or current readings, there may be an issue with the solar panel or its connection.
Step 4: Battery Charge Check (Using Voltage Tester)
Turn your voltage tester to the DC voltage (V) setting. Ensure the voltage setting is appropriate for your battery system (e.g., 12V or 24V).
Measure Battery Voltage
- Connect the voltage tester leads to the battery terminals: red to positive, black to negative.
- Observe the voltage tester reading, showing the battery’s voltage level.
- Voltage levels vary depending on the state of charge and battery type. For example, a fully charged 12V battery may read around 12.6-12.8V, while a discharged one might read about 11.8-12.0V.
Step 5: Interpret The Voltage Reading
Battery voltage is a dependable indicator of its price status. Here’s what different voltage readings usually suggest:
- Fully Charged: Voltage reading close to the battery’s nominal voltage (e.g., 12.6V for a 12V battery).
- 75-eighty five% Charged: Voltage reading barely lower than the nominal voltage.
- 50-75% Charged: Voltage studying extensively decreases than the nominal voltage.
- Below 50% Charged: Voltage analysis drastically decreases than the nominal voltage.
- Low or Discharged: Voltage studying properly beneath the nominal voltage, indicating a depleted battery.
Extra Understanding Of The Role Of The Charge Controller
- The price controller is a critical thing on your solar strength gadget. It regulates the go with the flow of strength from the sun panels to the battery.
- Modern rate controllers regularly have integrated features for tracking battery voltage and adjusting the charging manner.
- They save you from overcharging by disconnecting the solar panels from the battery when it reaches a particular voltage level (float or absorption level).
- Charge controllers protect against deep discharge, ensuring the battery remains within a safe voltage range.
Step 7: Disconnect and Safety
- Safely disconnect the multimeter, voltage tester, and any connections you made to the solar panel.
- Turn off the multimeter and shop your system.
Step 6: Take Action
- Depending on the voltage analysis, take appropriate action:
- If the voltage is fully charged, your battery is in a desirable circumstance.
- If the voltage is low, it can require charging.
- The extremely low voltage ought to indicate a deeply discharged or damaged battery, requiring expert attention.
- Monitoring battery price with a voltage tester and knowing the price controller’s role permit you to ensure that your battery stays in the most reliable situation, preventing overcharging or deep discharging and maximizing the lifespan of your solar battery system.
Get To Recognize The Charging Indicator For Solar Battery
- A charging indicator shows the reputation of a solar battery’s price.
- It may be in LED lighting, digital displays, smartphone apps, or audible alarms.
- Indicators display "Charging," "Float," and "Full" reputation.
- Some provide voltage, modern, and historical facts.
- They help customers screen and optimize their solar structures for efficiency and reliability.
Common Solar Panel Charging Issues And Troubleshooting
Solar panel charging issues can occasionally occur because of various factors. To ensure your sun gadget operates correctly, it’s crucial to cope with those troubles promptly.
Here are commonplace issues and troubleshooting pointers:
1. Reduced Power Output
- Issue: Solar panels generate less power than typical.
- Troubleshooting:
- Check for shading: Remove obstructions casting shadows at the panels.
- Inspect for dust or debris: Clean the panels regularly to preserve the most suitable sunlight absorption.
- Examine connections: Ensure all wiring connections are steady.
2. Battery Not Charging
- Issue: The battery doesn’t charge well.
- Troubleshooting:
- Check the price controller: Ensure it’s functioning successfully and installed correctly.
- Test the battery voltage: Use a voltage tester to verify if it’s receiving a rate.
- Inspect wiring: Look for loose or damaged wires and connections.
3. Inverter Problems
- Issue: The inverter presentations mistakes or fails to transform DC to AC power.
- Troubleshooting:
- Check inverter signs: Interpret error codes and follow producer hints.
- Inspect DC enter: Ensure the sun panel wiring to the inverter is secure.
- Contact a professional if wanted: Inverter troubles require specialized understanding.
4. Faulty Charge Controller
- Issue: The fee: controller malfunctions, affecting battery charging.
- Troubleshooting
- Verify controller settings: Ensure it is configured to your battery type (e.g., lead-acid, lithium). Inspect for damage: Look for physical damage or loose connections.
- Replace if necessary: Faulty rate controllers may want an alternative.
5. Weather-Related Issues
- Issue: Extreme weather conditions disrupt solar panel performance.
- Troubleshooting:
- Check for snow or ice: Clear panels of snow or ice throughout wintry weather months.
- Examine panel temperature: High temperatures can reduce performance and recall airflow.
Importance of Regular Maintenance:
Regular maintenance is vital to keep your solar panel machine running smoothly and for a protracted lifestyle. Consider those upkeep responsibilities:
1. Panel Cleaning
- Remove dust, dirt, and debris to ensure most daylight absorption.
- Clean panels with a soft brush or sponge and moderate detergent.
- Rinse with water and avoid abrasive materials that could scratch the surface.
2. Connection Checks
- Inspect wiring, connectors, and junction containers for free or broken elements.
- Tighten free connections and update damaged additives as needed.
3. Charge Controller Inspection:
- Ensure the price controller settings shape your battery kind and system necessities.
- Check for visual damage or uncommon signs at the controller.
4. Battery Testing
- Use a voltage tester to monitor the battery’s voltage stages often.
- Replace batteries that can no longer conserve a fee efficiently.
By addressing these commonplace issues and acting routinely to protect your solar energy device, you could maximize the efficiency and sturdiness of your solar energy device, ensuring it continues to offer smooth and sustainable energy for years yet to come.
How Do You Know If The Solar Battery Is Fully Charged?
To pick out if a sun battery is undoubtedly charged, take a look at its voltage with the use of a multimeter.
A 12V battery needs to be examined around 12.6-12.8V while wholly charged. Additionally, some rate controllers have LED signs that switch to maintenance mode when the battery is complete. Monitoring voltage frequently ensures your battery’s health and most advantageous performance.
A fully charged 12-volt lead-acid battery usually reads around 12.6 to twelve.8 volts.
If your battery reaches this voltage variety during charging and keeps it for an extended period, it is possibly wholly charged.
Modern solar fee controllers frequently have LED indicators showing the battery’s charging reputation.
How Do I Understand If My Solar Battery Could Be Better?
You can tell if a solar battery is awful if it no longer holds a charge nicely, wishes frequent recharging, or suggests fast voltage drops. Physical damage, overheating, unusual noises, inaccurate readings, or antique age are also signs. If you note those issues remember to try out or change the battery for better overall performance from the sun system.
How Long Does It Take A Solar Panel To Fee A Battery?
On average, a one hundred-watt solar panel can price a 50Ah (ampere-hour) battery from 50% to 100% in about 2-4 hours of direct daylight, assuming most fulfilling situations. However, this is a fashionable estimate, and charging instances can vary extensively, primarily based on panel wattage, battery capacity, climate situations, and the efficiency of the charging device. Larger panels or more than one panel can reduce charging time, whilst elements like overcast skies or shading can amplify it.
Final Result: How To Check If The Solar Panel Is Charging Battery
In conclusion, this article highlights the importance of solar battery efficiency for a reliable and sustainable solar power system. It covers basic features, including solar panels, maintenance basics and a proper battery charging system. The article builds on a brief list of safety-focused equipment, quick instructions on using a multimeter, symptoms, joint problems, and troubleshooting issues, emphasizing regular maintenance. Long-term benefits are highlighted, and the article answers frequently asked questions.
Follow Thesolarreview for more solar reviews!


")


