Are you curious about How To Make A Solar Panel With Aluminum Foil? If you have ever wondered whether it’s possible to tackle solar energy in a money-saving and naturally friendly way, you have come to the right place.
Solar panels are (exciting) devices that convert sunlight into electricity. In this complete and thorough guide, we will embark on an excit ing trip to make solar panels. I’ll walk you through creating a basic solar panel model using aluminum foil.
By the end of this article, you’ll clearly understand the materials you need and the step-by-step process, and be happy (by meeting a need or reaching a goal) to know that you can make your sun-based panels using aluminum foil.
So, let’s dig in and discover the secrets that make solar energy more (easy to get to, use, or understand) and low-priced.
How To Make A Solar Panel With Aluminum Foil In 2023
Before going ahead/moving forward, let’s first gather the materials that will help you make solar panels using aluminum foil. We will then discuss the use cases of such aluminum solar panels and their limits. We will also explore other choices for aluminum solar panels. Now, let’s go ahead and create a solar panel.
Materials You’ll Need
To get started, collect the following materials to make a solar panel from Aluminum foil:
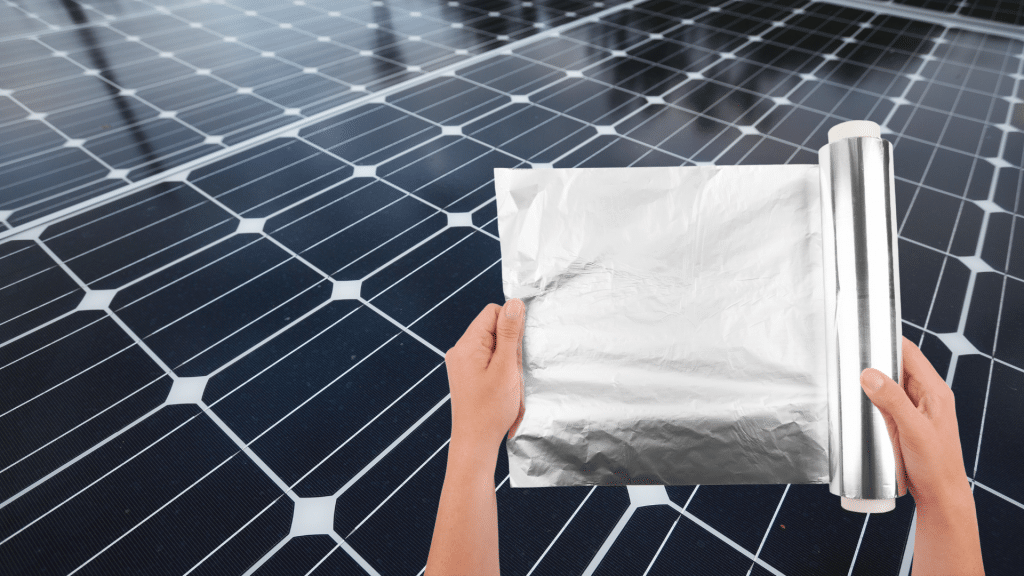
1. Aluminum Foil: One roll or a large sheet.
2. Cardboard: A solid piece to serve as the backing for your model.
4. Copper wire: To test created electricity through the setup
4. Strong Glue or Tape: To secure the parts/pieces.
5. A Light Source: You can use a bright lamp or, even better, natural sunlight.
6. Multimeter (Optional): For testing purposes.
Understanding Solar Panels
Before diving into the project, let’s briefly understand how solar panels work. Solar panels use an important thing/big event called the (related to electricity controlled by light) effect to convert sunlight into electricity.
These include solar cells made from materials such as silicon (elements used to make electronic circuits). When daylight hits the solar cell, it excites electrons and creates an electric current.
Step 1: Creating a Solar Cell Model
1. Begin by cutting a small square of aluminum foil.
2. Attach the foil to your cardboard backing using glue or tape, exposing a part of/amount of the foil. This exposed area will act as your solar cell.
3. Add copper wire at the back of each aluminum foil through the cardboard.
Step 2: Putting together/grouping the DIY Solar Panel
1. Place the transparent plastic sheet or glass over the foil-covered cardboard.
2. Secure the edges of the plastic or glass to the cardboard with glue or tape.
3. Secure/ensure the aluminum foil surface is completely exposed to light. This setup imitates/copies the structure of a solar panel.
Step 3: Testing Your DIY Solar Panel
1. Position your DIY solar panel under a bright light source, such as a lamp or direct sunlight.
2. Watch the exposed aluminum foil area closely.
3. While you won’t create electricity like an actual solar panel, you may (see/hear/become aware of) a slight increase in temperature on the foil due to sunlight exposure.
4. You can then add copper wire to a multimeter and notice the numbers in the Multimeter.
Step 4: Limits and Safety (things to carefully think about)
It’s essential to understand that this DIY model is purely for educational purposes and does not create usable electricity. Natural solar panels use fancy (or intelligent) materials and technology to produce power (in a way that has a lot with very little waste). Even in small-scale projects like this, when working with electricity, always exercise caution and think about/believe in safety.
An aluminum foil solar panel, often used for educational purposes or as a simple DIY project, has limited practical uses due to its small size and basic design. It is mainly used to (show or prove) the basic rules/ways of thinking about solar energy (changing from one form, state, or state of mind to another). It may need to be better for powering significant electrical devices or uses. Here are some expected benefits and limits of an aluminum foil solar panel:
Common Uses
1. Education: Aluminum foil solar panels are valuable tools for teaching and learning about solar energy and (related to electricity controlled by light) ways of thinking/fundamental truths/rules. They are often used in science classrooms and educational workshops to illustrate how sunlight can be converted into electricity.
2. Science Projects: Students and science fans may create aluminum foil solar panels as part of science projects or experiments to explore the idea of renewable energy
3. (Acts of showing or proving): These panels can be used for public (acts of establishing or proving), such as at science fairs or community events, to show off the essential workings of solar cells.
4. Small Devices: Sometimes, miniature aluminum foil solar panels may power tiny devices like small motors, LED lights, or small fans. The power created is usually (not having enough of something).
Limits
1. Low Power Output: Aluminum foil solar panels are not designed to create significant amounts of electricity. They produce (almost nothing/very little) power due to their small size and basic construction.
2. Not Practical for Home Use: These panels must be better for powering household appliances or meeting practical energy needs. They need to have the (wasting very little while working or producing something) and the ability (to hold or do something) of commercial solar panels.
3. Limited Ability to last: Aluminum foil panels are delicate and can be easily damaged. They are not built to survive harsh weather conditions or long-term outdoor exposure.
4. Educational or Emotional: These panels are primarily educational and may not be practical for real-world energy generation.
Aluminum foil solar panels are excellent tools for learning about solar energy, but they are meant for something other than practical energy generation.
They serve as educational models to help people understand the basic rules/ways of thinking about solar panels and their role in converting sunlight into electricity.
Professional-grade solar panels are used for practical solar power applications, which are much more (producing a lot with very little waste) and (able to last through harsh conditions).
The Other choices of Aluminum Solar Panels
Here are the two different ways of creating simple solar panels at home using other materials and describing their abilities to power small devices.
Different 1: Solar Cell Kit
Materials You’ll Need
1. Solar Cell Kit: These kits are readily available and contain solar cells, wiring, and basic instructions.
Creating a Solar Panel Model
1. Follow the instructions in the solar cell kit to put together/group together the parts/pieces.
2. Usually, these kits include pre-made solar cells with connectors that you can wire together.
3. Attach the solar cells to a piece of cardboard or a stiff/not flexible surface to create a small solar panel model.
Powering Tiny Devices
Solar cell kits are designed to (show or prove) the idea of solar energy (changing from one form, state, or state of mind to another). While small and may not create significant power, they can power tiny devices like LED lights and small fans or charge small electrical storage devices. These kits are excellent for educational purposes and understanding the practical uses of solar panels on a smaller scale.
Different 2: Homemade Dye-Sensitized Solar Cells (DSSCs)
Materials You’ll Need
1. Clear/open and honest Conductive Glass or Plastic: To serve as the (supporting structure/chemical being changed).
2. Titanium Dioxide (TiO2): For the (element used to make electronic circuits) layer.
3. Anthocyanin Dye: (pulled out or taken from something else) from fruits or vegetables for the dye layer.
4. Iodine Solution: To act as the electrolyte.
5. Counter-Electrode: Usually made of platinum-coated material.
6. Wires and Clips: For connecting parts/pieces.
7. Sunlight or a Bright Light Source: For testing
Creating a Solar Panel Model
1. Coat one side of the conductive glass or plastic with a thin layer of TiO2 paste.
2. Dip the coated glass into the anthocyanin dye solution.
3. Put the DSSC together/group it by sandwiching the TiO2-coated glass, dye layer, and counter-electrode together.
4. Connect the parts/pieces with wires and clips.
Powering Tiny Devices
DSSCs are more complex but can create little electricity when exposed to light. They can power small digital clocks, calculators, or low-power LED lights.
While not suitable for running home appliances, DSSCs are an exciting DIY project for those interested in solar cell chemistry and applications on a smaller scale.
Remember that both of these other choice methods are educational and (show or prove) the ways of thinking/fundamental truths/rules of solar energy (changing from one form, state, or state of mind to another). They are not meant for practical electricity generation but can be fun and information-giving DIY projects for learning about solar panels
Conclusion About How To Make A Solar Panel With Aluminum Foil
Creating a simple solar panel model with aluminum foil is a fun and educational way to explore the basic rules/ways of thinking about solar energy (changing from one form, state, or state of mind to another). This “making a Solar Panel with Aluminum foil” project won’t power your home but a tiny device, providing a valuable understanding of how solar panels work.
For practical solar energy needs, talk to professionals who can install commercial solar panels designed for electricity generation.
Follow TheSolarReview for more solar installation process!